

As a house warming gift — in our new home that finally had a work room — my mother graciously brought up my grandfather’s old bench vise. It was solid, functional, and well-worked. It’s hard to tell from wear, lubricating oil, and scuffs, but I believe it’s an old Craftsman swivel vise. It has to be at least fifty years old, yet it still glides like a brand new unit. It’s awesome. It’s a really cool tool, and it was my grandpa’s! It means a lot to be able to use one of my grandpa’s tools in my new found love of DIY and random projectry.
Then came the obvious problem. How do I install it? And where do I install it?
I decided to use an existing table that was in our basement, for installation. It was a little wobbly, and clearly wasn’t a true “work bench,” but with a few modifications I made it solid and usable (I cut scrap 2×4’s to add additional strength and support to the foundation of the table). I then proceeded to install the vise as best I knew how, filmed it, and I’m listing the steps below. I’ve done the best to keep the installation steps as easy and functional as possible given my limited knowledge — but based on how everything turned out, it appears I did everything correctly. Here are the tools I used and the steps I followed (as well as a video, if that’s easier for you to follow):
How-To Video:
Installation Steps:
- Position the vise on the table so at the full end of a swivel the vise portion hangs over the edge of the front of the work bench. When I swiveled the vice fully in the opposite direction, it was positioned with the vise over the work table (see images) .
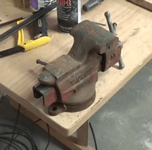
Vise swiveled over table 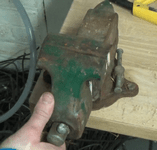
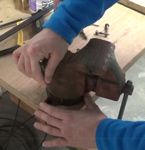
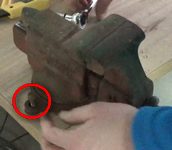
Vise swiveled off table - With the vise positioned where I wanted it in the table, I scribbled in the screw holes at the base of the vise to mark where to drill
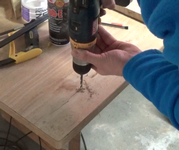
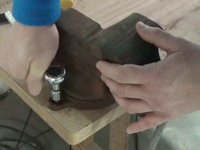
Marking drill holes - I removed the vise from the table, an drilled 7/32 holes through the pencil marks (the drill bit needs to simply be a smaller diameter than the bolt you will use to bolt the vise to the table. You can eye ball this by placing the tip of the bit against the tip of the bolt… Or you could use a bolt gauge. Or you could just know the size of the bolt because you bought the fucking thing. Three bolts came with mine so I had no clue what size they were.)
Drilling screw holes - I returned the vise back over the holes in the same orientation as before. I turned the lag bolts into the drill holes with my hand until I got about one thread of bite. Or just enough that the bolt would stand up on its own. (You can use normal bolts with a washer and nut for under the table if you want, but lag bolts were easy easier, and again… They already came with it.)
Hand setting lag bolts - I found the appropriate sized socket wrench and I tightened the shit out of the bolts. Well, I got them all snug first so I wouldn’t put it off its marks by tightening one bolt too tight, then with all of them relatively sunk in, I tightened the shit out of them)
Tightening w/ socket wrench - I double checked that I didn’t torque enough to split the wood of the work table, top and bottom, then I vised the shit out of things.
Tools (FYI: all “tool” images are links to purchase through Amazon):
1.) Swivel bench vise (mine’s a hand-me down, but this one is similar)

2.) Drill (I bought mine used on Craigslist, but this is the model — doesn’t get great Amazon reviews, but it’s worked well for me.)

3.) Drill bit (I used 7/32 based on my bolt size, but yours may be different)

4.) 3-4 lag bolts – depending on your vise base setup you may require 3 or 4. Mine only needed 3, but most vises I see, have 4 bolt holes. (Your bolts don’t need to be lag bolts, but I found they were easier to install, and they are still workable for how hard/not hard I’ll be pushing my vise).

5.) Socket wrench (I bought mine at Harbor Freight, but this is comparable — FYI the Harbor Freight version was 1/4 the cost of these, and they’ve worked well for me.)

6.) Pencil to mark bolt holes