
Building a Chicken Run for Your Chickies!
I’ll start off by saying that I’ve heard what I built called both a chicken run, and a chicken tractor. What specifically I built, or at least what people will call it I’ll leave up for debate, but I’ll refer to it as a run throughout this how-to article.
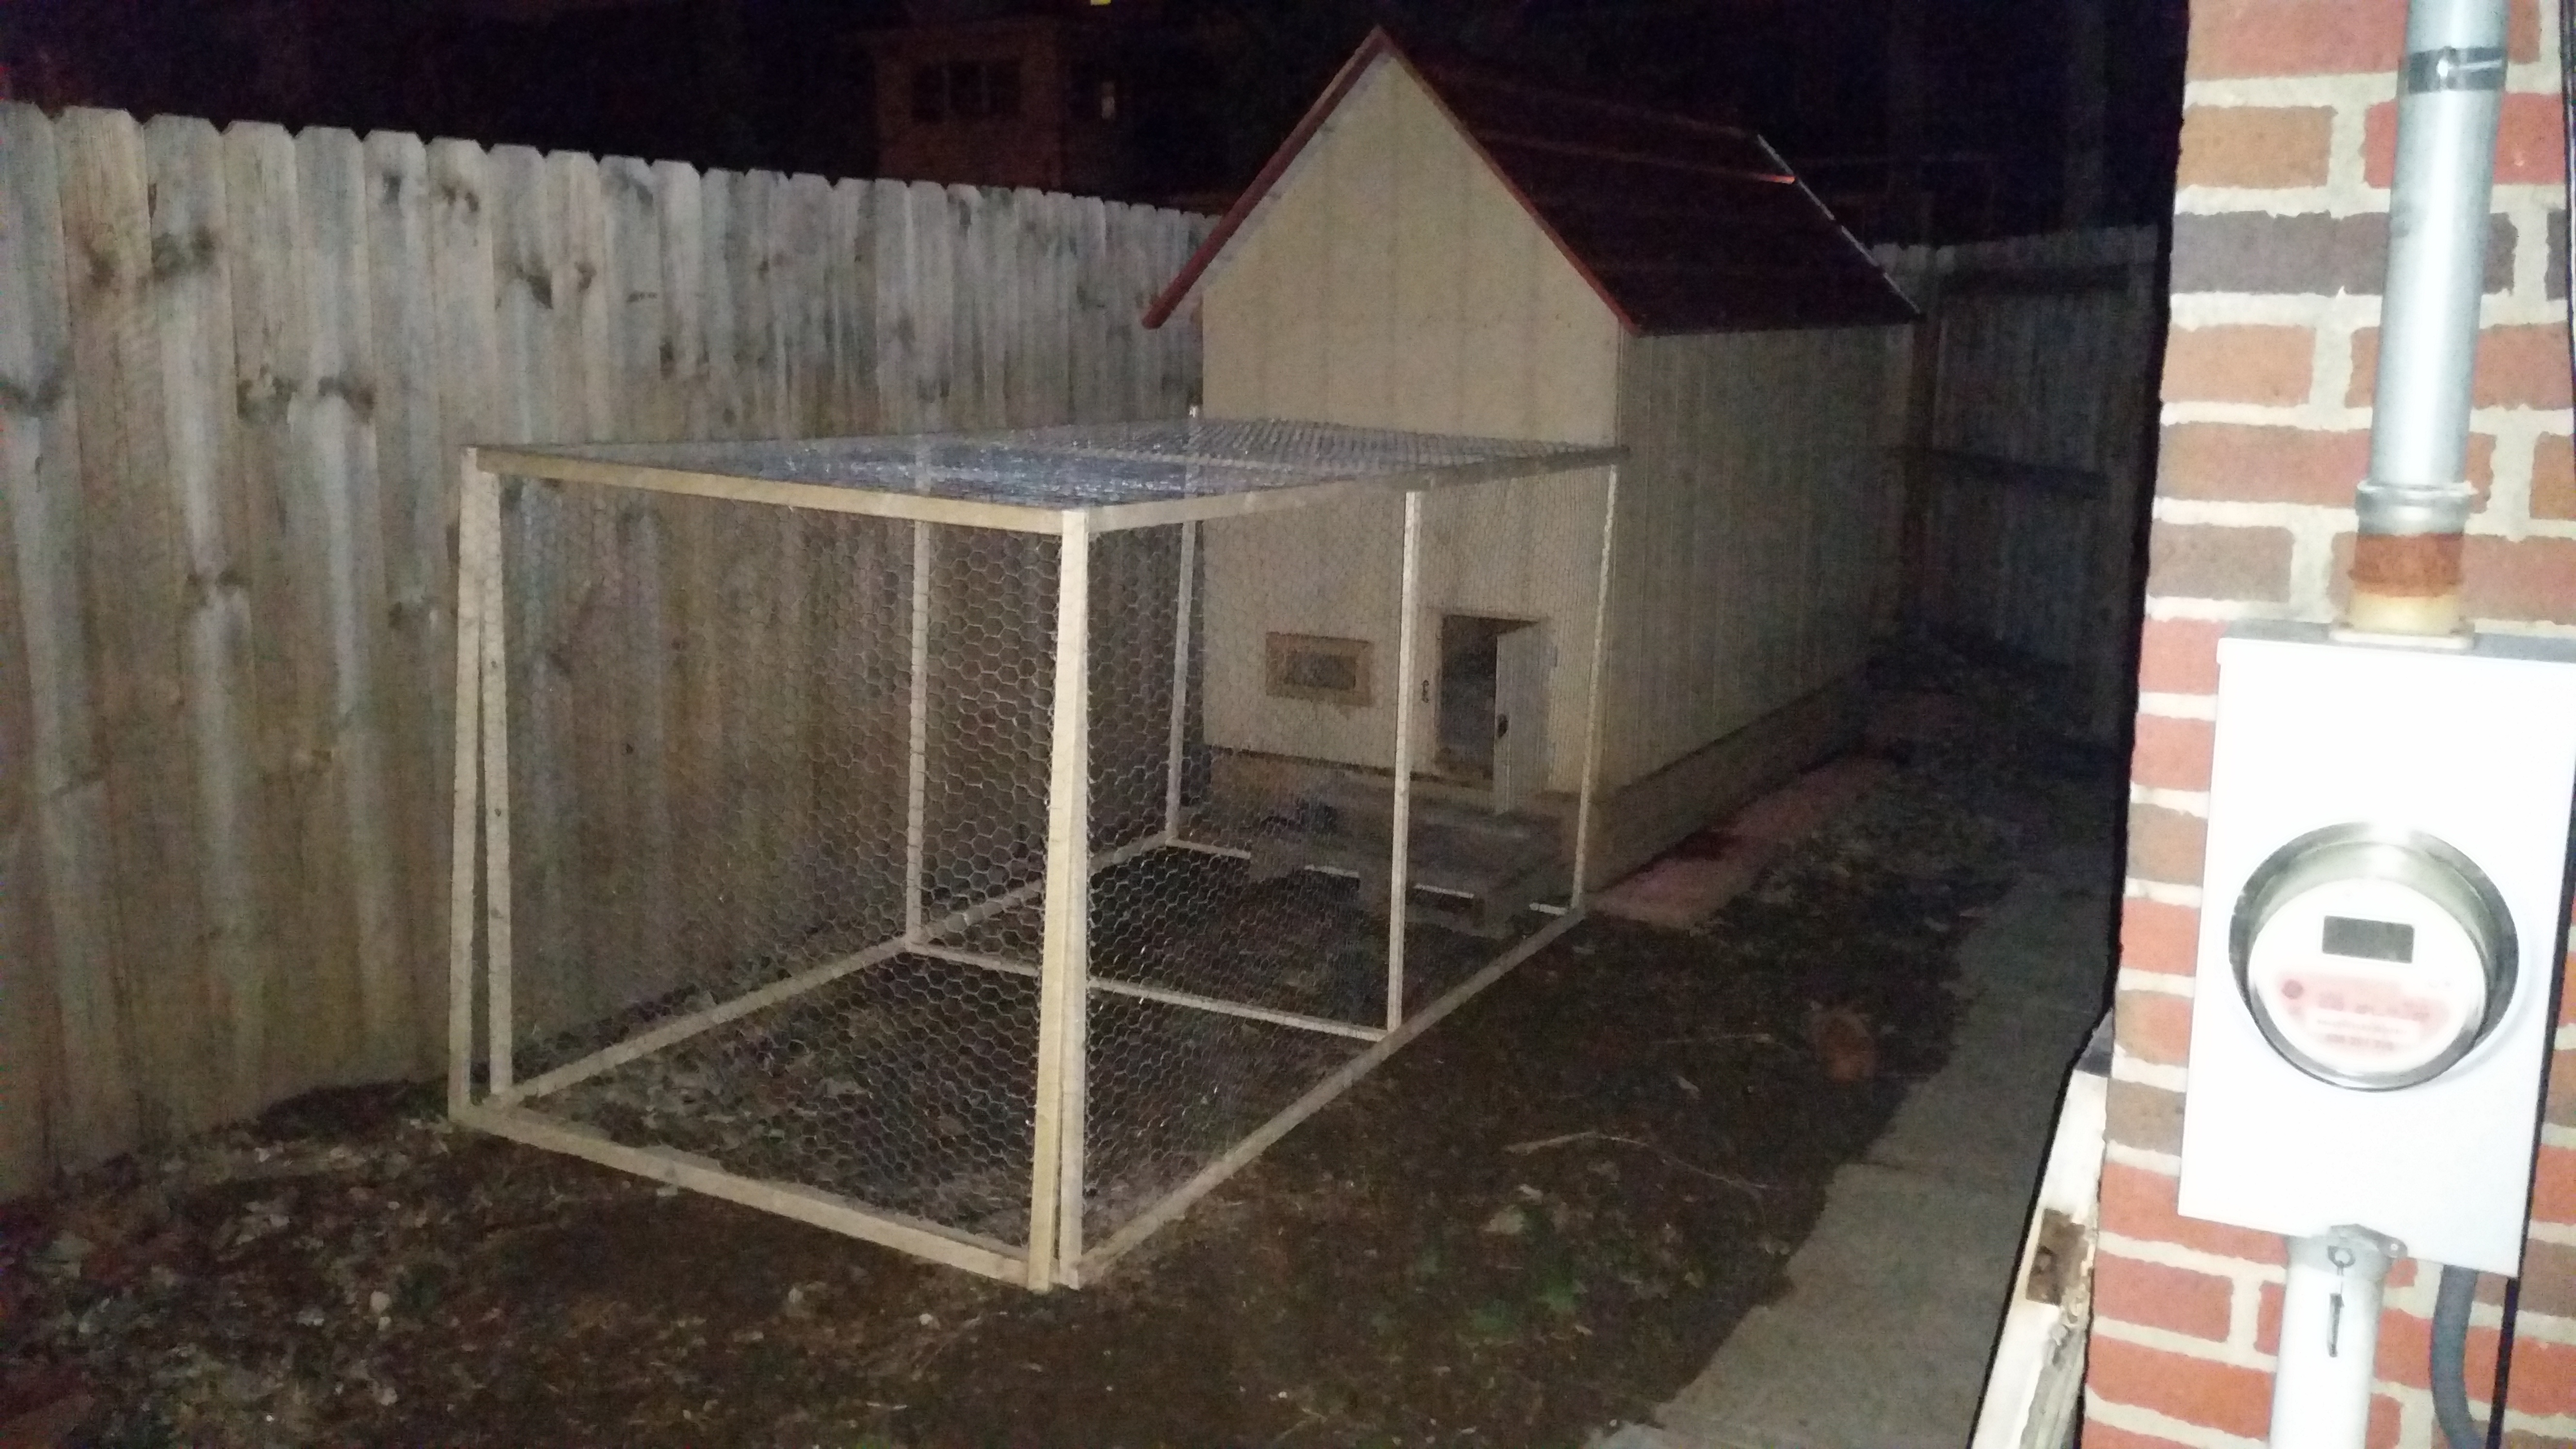
This chicken run, looks to be plenty spacious for my 6 chickens, and it was fairly cheap to build (<$75), but the time it took to build was not insignificant (about a full weekend day). The most expensive and time consuming part of this process, without question, was the chicken wire. The roll I purchased was ~$35 bucks, and like all chicken wire, came rolled tightly and was a pain in the ass to work with. I got the hang of unraveling and working with the wire after the first side of the run was complete, but wrapping the sharp ends under with a needle nose pliers was time consuming on all sides and doors. This is not to discourage you — it was definitely manageable — but just wanted to give you a heads up if you have chickens rip roaring to get outside quickly.
List of Tools Used:
- Miter saw – but pretty much any saw would do. The miter was probably overkill, but it sped things up, and I love using the miter saw
- Drill (at least 1) – I used two drills throughout the process. One to pre-drill screw holes, and then one to actually screw in the deck screws. This saved a lot of time, but definitely isn’t a requirement
- Needle Nose Pliers – Used to cut the chicken wire and wrap around the sharp ends of the wire once it’s cut
- 1/8″ Drill Bit – to pre-drill screw holes
- Phillips Head Screw Bit – to screw in the deck screws
- Staple Gun – You’ll want to get a heavy duty hand staple gun to punch through the wood frame when attaching the chicken wire. I used a cheap Harbor Freight staple gun, and it worked “just ok.” It wasn’t powerful enough to fully punch the staples flush over the wire and through the wood — but it did enough to hold.
List of Materials:
- 1″x2″ x 8′ Furring Strips x 14 – These are about $1 per piece, but you have to do some serious searching to find straight ones. I had to break apart 2-3 bundles of 18 sticks to find enough straight ones
- 2.5″ Deck Screws x box – Deck screws have a galvanized coating that slows the rusting process
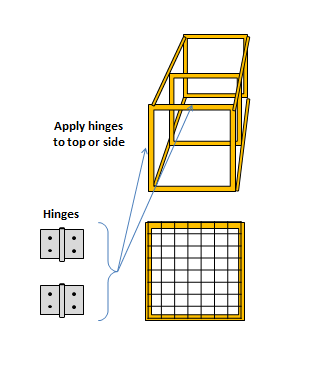
- Small metal hinges x 4 – Picked these up in the fastener section at Lowe’s. Should be ~$1.00 per hinge, and you can get away with a smallish 1.5″-2.00″ long hinge
Production Steps:
1. Cut 10 of your 8′ sticks in half. These pieces will be used to create three ribs for the chicken run frame, and the two doors
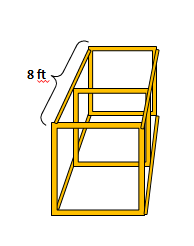
2. Set aside 8 of your half pieces, and use the remaining 12 half pieces to create the 3 rib sections of your run. Assemble the sticks into a square and pre-drill 2 holes in each corner, and then screw together with deck screws.

3. Attach 4 full length (8 ft) pieces along the edges of the three ribs, to create the frame of the chicken run:
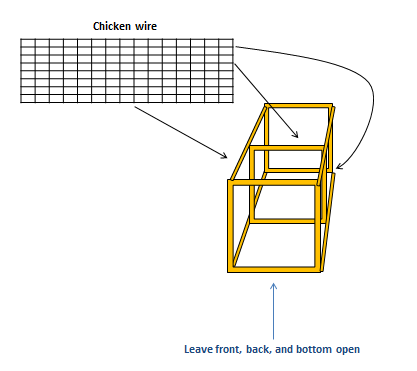
4. Using the staple gun, apply chicken wire along three of the four sides, leaving the bottom and the two ends open.
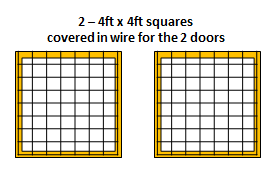
5. Create 2 additional 4′ x 4′ square frames (same format as the ribs) for the doors. You’ll then need to apply chicken wire to these, as well.
6. Using 2 hinges per door, attach the doors to the front and back of the chicken run frame. Based on how your chicken coop is situated in your room will determine the best way for your doors to open — whether it opens up or to the side. On my coop, I set it up to open different directions on each end.
For a video of the steps enclosed, please check out the video below: